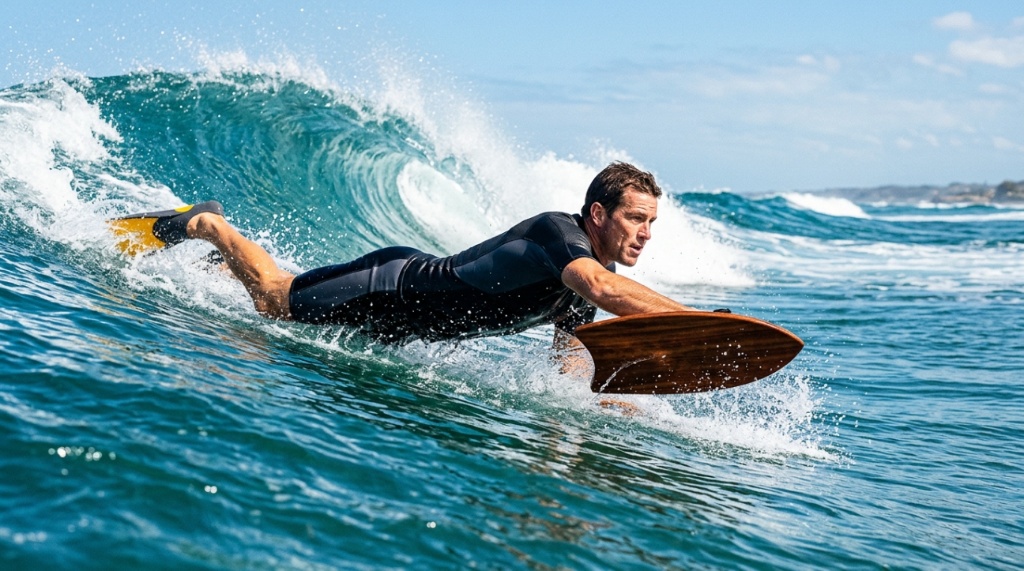
You’ve felt it before. You drop into a steep face, lock your rail, and for a split second, everything is perfect. Then the board kicks out, or your body drifts too high, and the wave wins. For bodysurfers, the difference between a controlled, carving ride and a chaotic tumble often comes down to the gear in your hand. A handplane isn’t just a piece of plastic; it’s your primary tool for steering, trimming, and holding your line. If you want to genuinely improve wave riding control, you need to understand how these small foils interact with the water, your body position, and the wave itself.
This guide breaks down the mechanics of handplane control, covering everything from choosing the right design to refining the subtle body movements that make a huge difference in the water.
Key Takeaways
- Handplane shape (rocker, rail, and outline) directly dictates how much grip and maneuverability you have on a wave face.
- Your body position, specifically the lead arm and shoulder rotation, is more critical to control than the handplane itself.
- Different wave conditions (steep, mushy, hollow) require different handplane designs and paddling techniques.
- Regular maintenance and proper hand placement are overlooked factors that significantly reduce control loss.
- Foot placement and hip positioning act as the rudder for your ride, complementing the rail work of the handplane.
Why Your Handplane Isn’t Holding a Rail
Most control issues aren’t a lack of strength; they are a mismatch between the handplane’s design and the rider’s technique. When you push your hand into the wave face, you are creating a high-pressure zone. The handplane’s bottom (the planing surface) generates lift, while the edge digging into the water (the rail) creates grip. If you feel like you are sliding sideways or bouncing, you likely have too much rocker for the wave angle, or you aren’t committing enough weight to the inside edge.
To understand how specific models influence your ability to improve wave riding control, consider the environment you usually surf in. A board designed for a steep, barreling wave in Florida will feel drastically different on a slow, crumbling beach break. The interaction between the rail and the water’s surface tension is where all your steering power comes from, and it requires deliberate input from your arm, wrist, and shoulder.
Understanding Handplane Dynamics: Shape vs. Size
Before you can fix your technique, you need to understand what your gear is actually doing. There are three main elements to a handplane that affect control: the outline, the rocker, and the rail. Each serves a specific purpose, and choosing the right combination is the first step toward a cleaner ride.
Outline and Surface Area
The outline is the shape of the board when viewed from above. A wide, teardrop outline offers maximum stability and lift, making it forgiving for beginners or smaller surf. A narrower, more elongated outline (often called an “el calamaro” style) allows for easier transitions from rail to rail. If you are trying to carve vertical snaps, a narrower outline helps you pivot. For high-speed trimming on a flat section, a wider outline gives you the float and stability needed to stay attached to the wave.
Rocker and Speed Control
Rocker is the curve from the nose to the tail. A handplane with heavy nose rocker helps prevent pearling (nose-diving) in steep, hollow takeoffs. However, too much rocker creates drag and makes it difficult to generate speed on flatter waves. Conversely, a flat rocker (or even a slight “belly” in the center) is incredibly fast but requires precise weight distribution to avoid catching an edge. For general wave control, look for a moderate continuous rocker that allows you to pivot off the top without stalling.
Rail Shape
The rail is your grip. A hard, sharp rail (like a 50/50 or a down rail) digs into the water, providing traction. A soft, rounded rail releases water more easily. For winter waves with a lot of power, a harder inside rail is essential to hold a line. For smaller, weaker waves, a softer rail is better because it allows water to flow freely, preventing the board from sticking or “chattering” on the surface,To maximize your cold-water performance and extend your sessions safely, make sure you Build the Perfect Cold Water Surfing Gear Setup before heading out into heavy swells.
Mastering the “High-Line” Technique
Once your gear matches the conditions, the next step is technique. The most effective way to control a ride is to maintain a “high-line”—meaning you stay in the steepest, most powerful part of the wave near the curl. To do this, your handplant needs to be dynamic, not static.
Here is a step-by-step breakdown of the handplant motion:
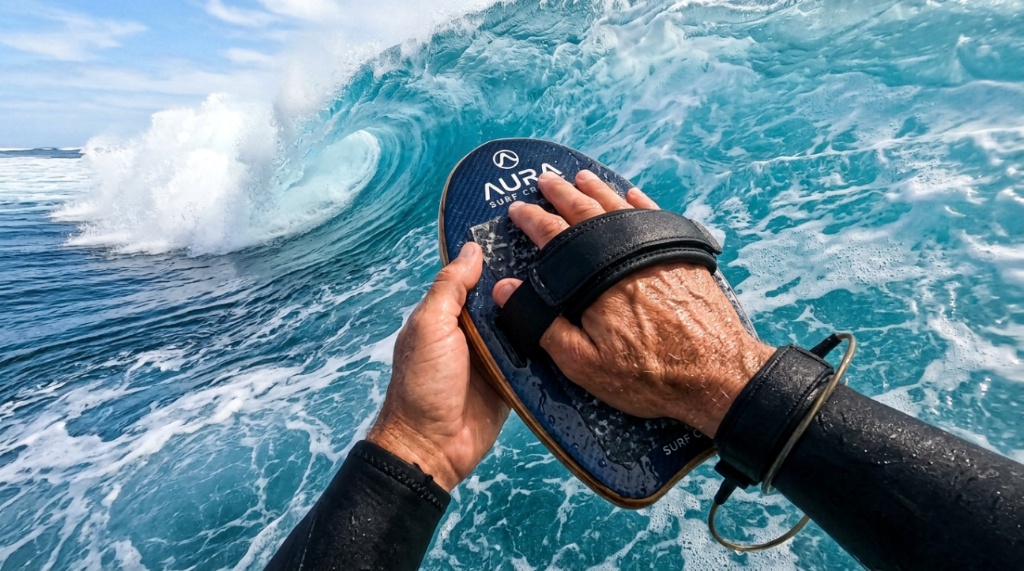
- Entry: Place the handplane into the wave face above your head, leading with the inside rail (the edge closest to the wave).
- Pressure: Apply downward and forward pressure. Drive your knuckles toward the bottom of the wave to bury the rail.
- Pivot: To turn, rotate your wrist and forearm. To go left, twist your wrist outward (supination). To go right, twist inward (pronation).
- Extension: Keep your arm extended. Bending the elbow reduces your lever arm and makes the board want to slide out from under you.
Many riders make the mistake of keeping their hand directly in front of their shoulder. For optimal control, the hand should be placed far forward and slightly across your body. This creates a pivot point that allows your torso and hips to swing through the turn.
Body Positioning: The Hidden Rudder
Your handplane is the front wheel of the car, but your body is the steering wheel, engine, and brakes. If your body position is off, no handplane in the world will save the ride. Focus on three key zones: the lead arm, the hips, and the head.
Lead Arm and Shoulder Rotation
The lead arm should act as an extension of your rail. If you are riding front-side (facing the wave), your bottom hand controls the handplane, while your top arm acts as a counterbalance. Rotate your shoulders to face the direction you want to go. Simply moving your head and looking down the line will naturally force your shoulders into the correct position, which in turn guides the handplane. Do not look at the handplane itself; look at your exit point on the shoulder of the wave.
Hip and Leg Positioning
Your legs act as the rear fin. To trim (go straight), keep your legs together and pointed down the wave face. To turn, kick your legs in the opposite direction of the turn. For example, to cut back toward the pocket, kick your feet out toward the flats. This counter-rotation generates torque, allowing you to jam the handplane into a pivot. If your legs are dragging behind you like a dead weight, you will lose all speed and control.
Condition-Specific Adjustments for Control
You cannot use the same technique in Florida beach breaks that you use on a reef pass in Indo. Here is how to adjust your approach based on the wave type:
| Wave Condition | Primary Goal | Handplane Strategy | Common Mistake |
|---|---|---|---|
| Steep/Hollow | Get in and get down | Use a high-rockered nose to avoid pearling. Keep the rail buried to maintain speed down the line. | Trying to do big turns. Focus on a fast, controlled glide first. |
| Mushy/Weak | Generate speed | Use a flat rocker to maintain momentum. Pump your arm slightly to “pump” the board like a skateboard. | Burying the rail too deep, which kills the minimal speed available. |
| Walled/Close-out | Going straight up and over | Use the handplane to climb the face, then tuck the board under your chest to glide over the top. | Turning sideways and getting caught in the whitewash. |
Common Mistakes That Kill Your Ride
Even experienced riders fall into bad habits. here are the most frequent issues that ruin control:
- Death Grip: Holding the handplane too tightly creates tension in your wrist and forearm, which makes the board rigid. Relax your grip; the water pressure will hold the board to your hand.
- Leading with the Elbow: If your elbow is bent at 90 degrees, your arm will fold under the pressure of the wave. Keep a slight bend (15-20 degrees) to absorb vibrations, but otherwise lock the arm out.
- Wrong Hand: If you are riding front-side and using the right hand in a right-breaking wave, you are placing the plane on the wrong rail. Always use the inside hand (closest to the wave) for the primary plant.
- Ignoring the Water Flow: If you feel vibration, it means the water is hitting the bottom of the board unevenly. Adjust the angle of your wrist to let the water flow smoothly from nose to tail.
Maintaining Your Gear for Consistent Performance
Control is not just physical; it’s mechanical. A damaged or dirty handplane will behave unpredictably. Check the rails for nicks or cracks. A ding on the rail creates turbulence and can cause the board to “catch” unexpectedly. Also, wax or grip patches are not just for comfort; they prevent your hand from slipping during high-G turns. If your hand slides, you lose an inch of travel, which equates to losing several degrees of turning angle.
Keep the bottom of the board clean. Saltwater scum and sunscreen residue build up and create drag. A quick rinse with fresh water and an occasional wipe with a degreaser will keep the planing surface slick and fast. This is the cheapest performance upgrade you can make.
Frequently Asked Questions
Should I use a thumbless grip or a full grip?
A full grip (fingers over the top, thumb underneath) is best for powerful waves because it secures the board during high-impact water. A thumbless grip (hand flat on top) allows for more wrist pivot and is better for small, playful waves where you need quick maneuvering. Start with a full grip until you build the forearm strength to control the board with a loose hand.
How do I stop my handplane from sliding down the wave?
This is caused by “skipping” or lack of rail pressure. Drive your hand vertically downward—not forward—at the moment of the plant. You need to push the water away from the rail to create a vacuum effect. Imagine screwing the board into the glassy face of the wave.
Can a handplane help me get barreled?
Yes. In hollow waves, a handplane allows you to extend your lead arm to control your trajectory inside the tube. Using a board with a high nose rocker prevents you from diving into the sand or reef. The control comes from using smaller, sharper adjustments on your wrist to stay in the “green room” rather than trying to muscle the board.
Is a bigger handplane always better for control?
Not necessarily. A bigger board creates more lift, but it is also harder to turn. It acts like a rudder that is too large—it resists changes in direction. For aggressive, vertical surfing, a smaller board offers less resistance when transitioning rails. For cruising and trimming, a larger board is more stable.
Conclusion
Improving your wave riding control is about aligning your equipment with your body mechanics and the environment. Start by evaluating your handplane’s rocker and rail to ensure it fits the waves you ride most often. Then, shift your focus from the board in your hand to the position of your head and shoulders. Keep your arm extended, drive through the inside rail, and let your hips counterbalance the motion. By combining the right gear with disciplined technique, you can transform a sloppy drop-in into a clean, carving line. Next time you paddle out, focus on just one of these adjustments, and you’ll feel the difference immediately.